Hardwood floors add warmth, elegance, and long-lasting beauty to a home. However, daily foot traffic, moving furniture, pets, dropped objects, and accidental spills can gradually damage the wood’s surface. Scratches, small dents, chips, and faded spots may make even a beautiful floor look worn. Fortunately, a hardwood floor repair kit can help homeowners fix many minor imperfections without replacing entire floorboards or hiring a professional for every small repair.
A hardwood floor repair kit typically includes materials such as wood filler, repair wax, touch-up markers, putty, or color-matching products. Some kits are designed for surface scratches, while others help repair deeper dents, chips, and small holes. Choosing the right kit depends on the type of flooring, the extent of the damage, and the finish of the wood.
In this guide, you will learn what hardwood floor repair kits contain, how to choose the right product, how to repair common flooring problems, and how to maintain your floors after completing the repair.
What Is a Hardwood Floor Repair Kit?
A hardwood floor repair kit is a collection of tools and materials designed to repair minor damage to wood flooring. These kits allow homeowners to improve the appearance of damaged areas without undertaking a complete floor renovation.
Depending on the product, a kit may include:
- Wood repair wax sticks
- Color-matching touch-up markers
- Wood filler or repair putty
- Blending tools and plastic scrapers
- Application tools
- Sanding accessories
- Instructions for matching colors and applying repairs
Some kits use soft wax for light scratches, while others contain harder wax or filler intended for deeper damage. More advanced kits may include heating tools for melting and applying hard repair wax.
Before purchasing a kit, check whether it is suitable for solid hardwood, engineered wood, laminate flooring, or another surface. Products designed for one flooring type may not be appropriate for another.
Common Hardwood Floor Problems a Repair Kit Can Fix
1. Surface Scratches
Surface scratches are among the most common hardwood flooring problems. They can occur when furniture moves across the floor, grit becomes trapped under shoes, or pets scratch the finish.
For light scratches that affect only the finish or leave a faint mark, a suitable touch-up marker or scratch repair product may improve the appearance.
Deeper scratches that expose the bare wood may require a color-matched filler or more extensive refinishing.
2. Small Dents and Indentations
Heavy furniture, dropped objects, and concentrated pressure can leave dents in hardwood flooring. Repair wax or suitable wood filler may help disguise small indentations.
However, dents that have crushed the wood fibers cannot always be restored completely with a surface repair kit. The best solution depends on the depth of the indentation and the condition of the surrounding finish.
3. Chips and Small Holes
Chips near board edges and small holes can make hardwood floors appear damaged or uneven. A compatible wood filler or harder repair wax may help fill the missing material and blend the area with the surrounding floor.
For larger holes, loose boards, or damaged tongue-and-groove connections, a more extensive repair may be necessary.
4. Faded or Discolored Areas

Sunlight, cleaning products, spills, and normal wear can change the appearance of hardwood flooring. Color-matching markers and repair products may help conceal small areas of discoloration.
If the finish has worn away across a large area, a touch-up product may not provide a consistent result. Refinishing may be more appropriate.
5. Minor Edge Damage
The edges of hardwood boards may chip when heavy objects are dropped or furniture is moved carelessly. A suitable repair filler can help restore the appearance of small chips.
Make sure the damaged area is clean and dry before applying any product.
Types of Hardwood Floor Repair Kits
Different repair kits are designed for different kinds of damage. Understanding the available options can help you select a product that suits your flooring.
| Repair kit type | Best suited for | Important consideration |
|---|---|---|
| Wax repair kit | Small scratches and shallow chips | Match the wax color to the floor |
| Touch-up marker kit | Light surface scratches and color imperfections | Works best when damage is limited |
| Wood filler kit | Small holes, chips, and deeper defects | Check compatibility with the flooring finish |
| Hard wax repair kit | More noticeable scratches, dents, and small chips | May require a heating tool |
| Multi-color repair kit | Floors with varied wood tones and grain patterns | Blending colors takes practice |
Wax-Based Repair Kits
Wax-based kits are popular for minor flooring repairs because they can fill small defects and help blend damaged areas with the surrounding wood.
Many kits contain several shades that can be mixed or layered to approximate the floor’s natural color. Hard wax products may be more suitable for deeper damage than softer waxes, depending on the manufacturer’s instructions.
Touch-Up Marker Kits
Touch-up markers are designed to conceal small scratches and color variations. They are generally easy to apply and can be useful for quick cosmetic improvements.
Markers do not fill deep grooves or replace missing wood. They are most effective when the scratch is relatively shallow and the color can be matched closely.
Wood Filler Repair Kits
Wood filler is useful for certain small holes, chips, and defects where material is missing. After application, some fillers require smoothing, drying, and possibly sanding.
Not every filler is suitable for finished flooring. Choose a product specifically recommended for the type of wood and repair you are completing.
Multi-Purpose Repair Kits
Multi-purpose kits often include markers, wax sticks, fillers, and application accessories in several colors. They can be useful when a floor has different shades or several types of minor damage.
Check the included instructions to determine which components are suitable for each repair.
How to Choose the Best Hardwood Floor Repair Kit
Selecting the right kit involves more than finding a similar wood color. You should also consider the damage, finish, flooring material, and application method.
Identify Your Flooring Type
First, determine whether your floor is solid hardwood, engineered wood, laminate, or a wood-look vinyl product.
Solid hardwood has a natural wood surface throughout its thickness. Engineered wood has a real wood veneer over a layered core, while laminate generally has a decorative image layer rather than a solid wood surface.
Repair methods vary by construction. Aggressive sanding, excessive heat, or incompatible chemicals can damage certain flooring types.
Match the Color Carefully

Hardwood floors come in many shades, from pale oak and maple to darker walnut and mahogany tones. Some boards also contain natural grain variations.
Choose a kit with multiple colors when possible. Test the product in an inconspicuous area before applying it to a visible section of flooring.
Consider the Depth of the Damage
For light scratches, a touch-up marker may be sufficient. Small chips and deeper grooves may require wax or filler.
If the board is split, loose, swollen, or severely damaged, a basic repair kit may not solve the underlying problem.
Check the Finish Compatibility
Hardwood floors may have polyurethane, oil-based, waxed, or other finishes. The repair material should be compatible with the existing surface.
Read the product label and follow the manufacturer’s instructions, especially when the repair involves sanding, heat, or chemical products.
Compare Ease of Application
Beginners may prefer kits with clear instructions, color samples, and simple application tools. More advanced hard-wax kits can produce good cosmetic results but may require additional practice.
Choose a kit that matches your comfort level and the complexity of the repair.
Step-by-Step Guide to Repairing Hardwood Floors
Following a careful process can help you achieve a cleaner and more natural-looking result.
Step 1: Clean the Damaged Area
Remove dust, grit, and loose debris using a suitable vacuum attachment or a soft cloth. If necessary, use a wood-floor cleaner recommended for your finish.
Allow the area to dry completely before applying the repair product. Dirt trapped beneath wax or filler can affect adhesion and appearance.
Step 2: Test the Repair Product
Select a color that closely matches your flooring and test it in a hidden location or on a spare piece of matching material.
Check the color after application and drying, since the finished appearance may differ from the product while it is being applied.
Step 3: Apply the Repair Material
Follow the instructions for the selected kit.
For a light scratch, gently apply the touch-up marker in the direction of the wood grain. For a small chip, use the recommended wax or filler and apply only enough material to fill the damaged area.
Avoid spreading excess product across the surrounding finish.
Step 4: Smooth the Repaired Area
Use the included scraper or another recommended tool to level the repair material. Work carefully to avoid scratching the surrounding floor.
Some products require curing or drying before smoothing. Follow the specific product instructions rather than assuming every kit uses the same process.
Step 5: Blend the Color and Grain
If the kit includes several shades, carefully blend them to create a more natural appearance. Applying a single flat color to a wood surface with varied grain may make the repair more noticeable.
For realistic results, consider the direction and pattern of the surrounding grain.
Step 6: Allow the Repair to Set
Let the material dry, cool, or cure for the period specified by the manufacturer. Avoid walking on the repaired area or moving furniture over it until the product is ready for use.
Do not apply an additional finish unless the product instructions specifically recommend it.
Hardwood Floor Repair Kit vs. Professional Repair
A repair kit is useful for small cosmetic defects, but it is not suitable for every flooring problem.
| Repair method | Best application | Main limitation |
|---|---|---|
| DIY repair kit | Small scratches, minor chips, shallow dents | Results depend on color matching and application |
| Professional spot repair | More noticeable localized damage | Costs more than a basic DIY product |
| Board replacement | Split, severely damaged, or swollen boards | Requires compatible replacement material |
| Floor refinishing | Widespread surface wear and finish damage | More time-consuming and disruptive |
If your floor has widespread scratches, deep gouges, water damage, or structural movement, consider obtaining a professional assessment.
A repair kit can improve appearance, but it cannot correct every underlying issue.
Factors to Consider When Buying a Hardwood Floor Repair Kit
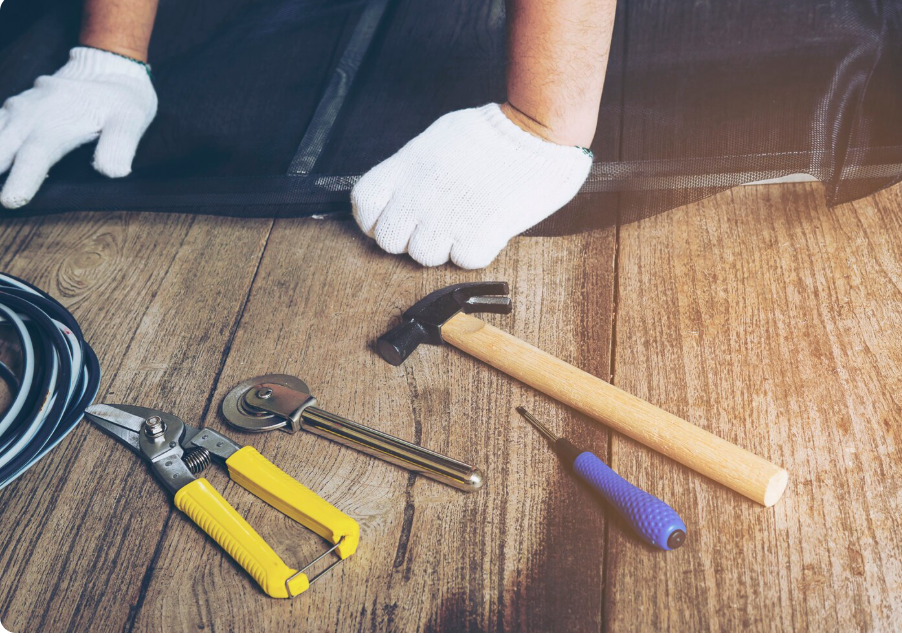
Before purchasing a kit, review its contents and intended use.
- Number of colors: Multiple shades can make matching natural wood grain easier.
- Repair material: Confirm whether the kit contains wax, marker, filler, or another material.
- Application tools: Scrapers, blending tools, and applicators can simplify the process.
- Floor compatibility: Verify suitability for your flooring type and finish.
- Instructions: Clear directions are particularly helpful for first-time users.
- Coverage: Some products are designed for a few small repairs, while others contain enough material for multiple defects.
- Durability: Check the manufacturer’s guidance on wear resistance and maintenance.
- Safety information: Follow handling instructions and provide appropriate ventilation when required.
The most expensive kit is not automatically the best option. A simple marker may be all you need for a small surface scratch, while deeper damage may require a different repair method.
Tips for Maintaining Hardwood Floors After Repair
Once you have repaired the damaged area, good maintenance habits can help protect the surrounding floor.
Use Furniture Pads
Attach suitable felt or protective pads to chair legs, tables, and other furniture. Check them regularly for trapped grit and replace worn pads when necessary.
Keep Dirt and Sand Under Control
Small particles can act like abrasives under shoes. Use entrance mats and sweep or vacuum regularly with equipment suitable for hardwood floors.
Clean With Appropriate Products
Use cleaning products recommended for your flooring finish. Avoid excessive water and harsh chemicals that may dull or damage the surface.
Protect Floors From Moisture
Wipe up spills promptly and investigate signs of recurring leaks. Moisture can cause swelling, staining, and changes in board shape that a cosmetic repair kit cannot resolve.
Move Furniture Carefully
Lift furniture when possible instead of dragging it across the floor. For heavier items, use suitable moving equipment and floor protection.
Inspect the Floor Periodically
Check for new scratches, loose boards, finish deterioration, and discoloration. Addressing minor damage early can help prevent more extensive repairs later.
Common Mistakes to Avoid When Using a Hardwood Floor Repair Kit
Even a suitable product can produce poor results if it is applied incorrectly.
- Choosing a repair color that is too light or too dark.
- Applying wax or filler over dust or moisture.
- Using a product designed for laminate on an incompatible hardwood finish.
- Overfilling a scratch or chip.
- Sanding a thin engineered wood veneer too aggressively.
- Applying heat without following the manufacturer’s safety instructions.
- Walking on the repaired area before it has set.
- Expecting a cosmetic kit to repair swollen or structurally damaged boards.
For the best result, test the product first and work slowly in a small area.
Conclusion
A hardwood floor repair kit can be a practical solution for improving the appearance of minor scratches, small dents, chips, and localized color imperfections. By choosing a compatible product, matching the color carefully, and following the application instructions, homeowners can complete many small repairs without replacing entire floorboards.
The best kit depends on the type of flooring, the depth of the damage, and the existing finish. Touch-up markers work well for some surface scratches, while wax and filler products may be better suited to small chips and deeper defects.
For widespread wear, severe water damage, split boards, or loose flooring, professional repair or refinishing may provide a more reliable solution. Combine appropriate repairs with regular cleaning, furniture protection, and moisture control to keep hardwood floors looking attractive for years.
Frequently Asked Questions (FAQs)
1. What is the best hardwood floor repair kit for scratches?
The best kit depends on the depth of the scratch and the floor’s finish. Touch-up markers can help conceal light scratches, while wax-based kits may be more suitable for small grooves and chips. Always check compatibility before use.
2. Can a hardwood floor repair kit fix deep scratches?
Some kits can improve the appearance of deeper scratches by filling the damaged area with wax or filler. However, severe gouges that remove substantial wood may require professional repair or board replacement.
3. Are hardwood floor repair kits suitable for engineered wood?
Some are, but suitability depends on the product and the thickness and condition of the wood veneer. Avoid aggressive sanding or excessive heat unless the manufacturer confirms that the method is appropriate.
4. How do I match a repair kit to my hardwood floor color?
Identify the closest base shade and look for a kit containing multiple colors when possible. Test the product in an inconspicuous area and consider the direction and variation of the wood grain.
5. When should I hire a professional instead of using a repair kit?
Consider professional help for widespread damage, severe gouges, swollen boards, recurring moisture problems, loose flooring, or repairs that affect a large visible area. A professional can determine whether spot repair, board replacement, or refinishing is the most suitable option.